Looking to recreate a spa-quality facial at home but unsure where to start? A deep cleansing facial is not just a luxury confined to the spa – you can perfectly conduct one within the comfort of your own home.
This comprehensive guide provides step-by-step instructions for a professional deep cleansing facial. You can do it by yourself, saving both time and money. Revitalize your skin and achieve that enviable glow – all while sipping your favorite beverage in your pajamas.
Let’s dive in!
Step 1: Cleanse
Commencing any facial involves a meticulous cleansing of your skin. This is important to remove any traces of makeup, dirt, and excess oil that may have accumulated on the surface of your skin.
Choose a gentle cleanser that is suitable for your skin type and massage it into your skin using circular motions. Use a high-quality cleansing brush like the GLOWDROP silicone facial cleansing brush for better cleansing.
Take your time and spend about a minute working the cleanser into your skin before rinsing it off with lukewarm water. After cleansing, gently pat your face dry with a soft towel.
Step 2: Exfoliate
Skin exfoliation is a crucial step in your facial routine as it helps to remove dead skin cells and unclog pores. Opt for an exfoliating scrub or a chemical exfoliant that is specifically formulated for your skin type.
Apply the exfoliant to your face and gently massage it in circular motions, avoiding the sensitive eye area. Take care not to scrub too harshly, as this can irritate the skin. Rinse off the exfoliant with water and pat your face dry.
Step 3: Steam
Steaming is a beneficial step that helps to open up your pores and soften blackheads and whiteheads, making them easier to remove later on. Start by boiling water in a large pot and then transfer it to a bowl.
Hover your face over the bowl, enveloping your head with a towel to capture the rejuvenating steam. Allow the steam to envelop your skin for about 10 minutes, allowing it to penetrate deeply.
Step 4: Extract
Once your pores are open and softened from the steam, you can proceed to extract any blackheads and whiteheads. It is important to use a blackhead extractor tool or clean fingers wrapped in tissue to gently remove these impurities. Be cautious and avoid applying excessive pressure, as this can lead to scarring and redness.
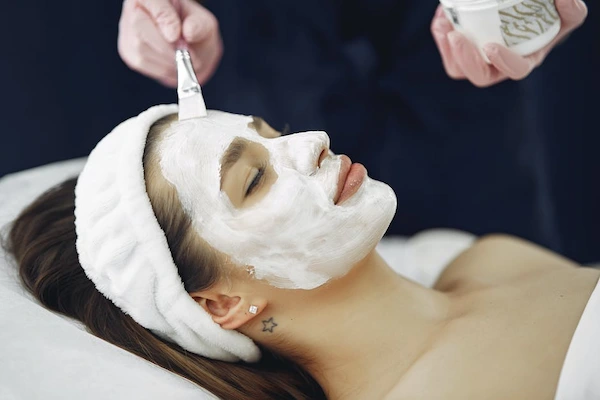
Step 5: Mask
When choosing a mask, consider opting for clay masks if you have oily skin to help absorb excess oil and unclog pores, or go for hydrating masks if you have dry skin to replenish moisture and restore a healthy glow.
Before applying the mask, initiate the process by cleansing your face and gently patting it dry. Then, using clean fingertips or a mask applicator, create an even layer of the mask, ensuring the delicate eye area is avoided.
As you relax, let the mask work its magic, allowing the nourishing ingredients to deeply penetrate your skin and address your specific concerns. The recommended time to leave the mask on varies depending on the product, so be sure to check the instructions.
During this time, the mask will gradually dry or infuse your skin with moisture, depending on the type you choose. This allows the mask to draw out impurities, refine pores, and deliver a boost of hydration, leaving your skin feeling refreshed and rejuvenated.
Once the designated time has passed, it’s time to rinse off the mask. Use lukewarm water to gently massage your skin, ensuring that all traces of the mask are removed.
Step 6: Tone
Toning is an essential step in any professional skincare routine, as it not only helps balance the pH levels of your skin but also prepares it for subsequent treatments. When selecting a toner, it’s important to consider your specific skin type to ensure the best results.
After choosing a suitable toner, apply it to your face using a soft cotton pad. With gentle swiping motions, make sure to cover all areas of your skin, paying extra attention to those that may be more prone to oiliness or congestion.
This simple yet effective process will leave your skin feeling refreshed, revitalized, and ready for the next steps in your home skincare regimen.
Step 7: Moisturize
The final step in your facial routine is to moisturize your skin, providing it with the essential hydration and nourishment it needs to maintain a healthy and radiant appearance. It is crucial to choose a moisturizer that is specifically formulated for your unique skin type, taking into consideration factors such as dryness, oiliness, or sensitivity.
Gently massage the moisturizer onto your face using upward motions, allowing it to penetrate deeply into the skin and promote optimal absorption. This not only helps to lock in moisture but also improves circulation, resulting in a more rejuvenated and youthful complexion.
After the application, you will notice that your skin feels incredibly soft, supple, and well-hydrated, ready to face the day with a natural glow.
Bonus: Facial Massage
To enhance the benefits of your at-home facial, you can incorporate a facial massage into your routine. This additional step helps to further stimulate blood circulation, reduce puffiness, and improve overall skin texture.
Use your fingertips or a jade roller to gently massage your face in circular motions, starting from the center and working your way outwards.
Take your time and focus on areas that may feel tense or congested, such as the forehead, jawline, and cheekbones. Enjoy the relaxing and rejuvenating experience as you pamper your skin.
Start Deep Cleansing Facial Today
With these simple steps, you can give yourself a professional deep cleansing facial without leaving the comfort of your home. Remember to always choose products that suit your skin type and concerns for the best results.
Including regular facials in your skincare routine is crucial for sustaining healthy, radiant skin. Ensure their incorporation for optimal skin care. So, take some time out of your busy schedule and indulge in a relaxing, deep cleansing facial at home.
Enjoyed this guide and want to discover more tips? Don’t stop here! We have a wealth of articles for you to explore on our blog.